I have enjoyed building my own track since High School. When I switched to O scale I discovered that laying my own rail was for me, however, a financial necessity. But laying rail is not difficult, just takes a little practice, and for me is one of the most satisfying parts of the hobby. There have been many articles in hobby press on hand-laying track and switches, but not much on cutting, or gluing, of ties. With the amount of track on the A&O railroads, purchasing ties was cost prohibitive. Besides, I already had a table saw! So here is a brief description of how to go about spending some time, but saving lots of $$ by cutting your own RR ties.
WARNING!!! The following description assumes a certain degree of comfort and competency in working with a table saw. Working slowly and deliberately is absolutely necessary to keeping all body parts attached.
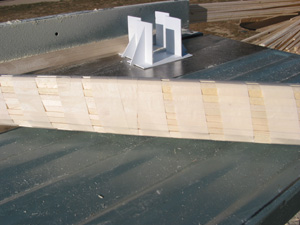
Trips to your favorite lumber supplier will provide dimensional lumber suitable for cutting ties. Lowe's often has planed 1x4's that are relatively free of large knots that work well- plus they are very inexpensive. Chose White Pine over Yellow Pine. Yellow Pine will be heavier, more dense, and...yellowish. Though usually occupying the same lumber crib, I pick through the stack and select only the straightest, clearest, knot free pieces. (They love to see me coming.)
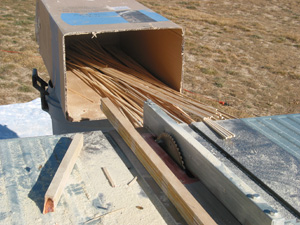
Generally a 4' length is the longest I want to run through the saw, but on occasion a 6' piece meets the criteria for clarity and straightness, so that piece is simply cut in half before cutting.
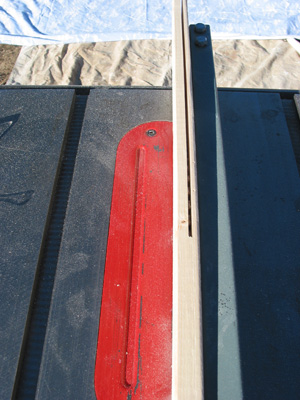
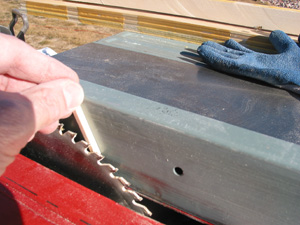
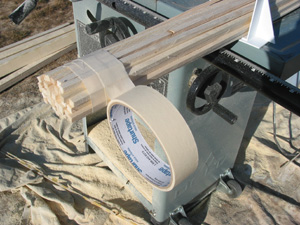
For cutting ties, vs ripping wood, I use a "Fine Finish" carbide tipped blade. It is worth spending a few bucks to get a good quality blade that will not go dull and overheat.